Loading measuring
data from clipboard
Click on
the button Load from Clipboard and the window in figure C-1 will show up.
|
|
|
Figure
C-1 |
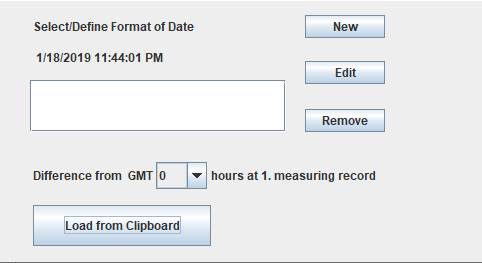
1.
In
the window are shown the date and time part of first line of measuring data.
The first time you are using the software it is necessary to define the format
of date and time.
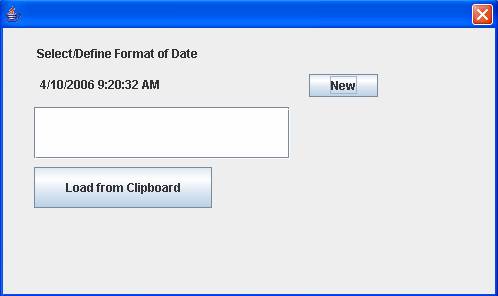
2.
Press
the New-button and the window in figure C-2 appears.
|
|
|
Figure C-2 |
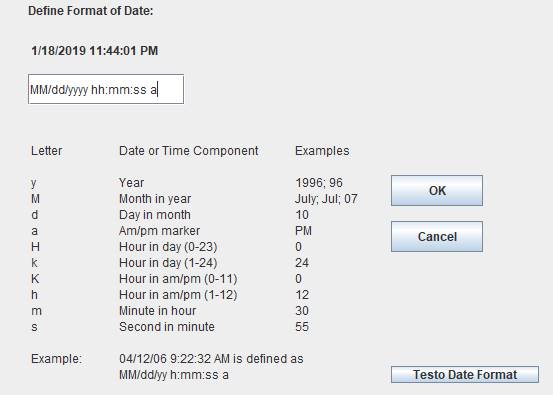
3.
Define
the date and time format of the measuring by means of the code letters, please
note the example in the bottom of the window.
4.
When
you leave the window by means of the OK-button, after defining the format, the
format will show up in list of formats, Figure C-1. These formats are
automatically stored and next time you want to retrieve data you can just
select the relevant format.
|
|
|
Figure
C-3 |
5.
Now
select the button Load from Clipboard and what you have placed on the clipboard
is read by means of the selected data/time format. If an error occurs at this
moment the specified time and date-format is not matching the actual format of
the measuring data.
6.
When
data is successfully loaded the window is showing a table and 2 graphs
representing the measured temperature of the sample and of the ambient. See
figure C-4 showing an example from measuring heat of hydration.
|
|
|
Figure
C-4 |
7.
Misreadings
must be removed before continuing. When you are selecting a row in the table by
clicking the mouse the corresponding position on the graph is shown with a
cross-hair. You can move along using arrow-keys and page up/page-down-keys to
point out misreading. Misreadings are deleted by means of the Delete-key. It is
possible to mark an interval and delete it in one operation.
8.
Also,
at the end of the test, not relevant data from disconnecting the thermocouples
should also be removed.